Sometimes you get busy and you turn around and it’s been a couple of weeks since you’ve done something. In my case, it’s been a couple of weeks since I update my blog. It’s not that I haven’t been doing anything blog-worthy…well I guess that depends on your point of view really, but the past two weeks have been busier than usual. I will be very glad when I can drop the weekend job and just work a standard week. Anyway, on to the things I’ve been working on the past two weeks.
Kitchen Cabinet Update
Last weekend I started trial runs on making the doors for the corner cabinet. I’ve never done this sort of woodworking before so I knew it wasn’t going to be perfect on the first attempt. Luckily I have plenty of scrap wood to work with. I didn’t get very many pictures during all of this because I was really pressed for time and was concentrating on trying to figure out the process rather than documenting. Looking back, I probably should have kept better records so I would at least have something to look back on when I try again.
So these are the router bits I picked up a few weeks ago at Rockler for making my cabinet doors.
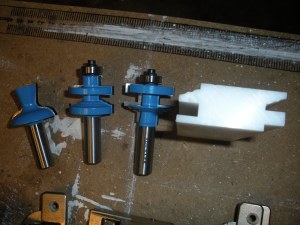
Router Bits for my Cabinet Doors
Left to Right: Custom Door Edge Router Bit, Classical Stile Bit, Classical Rail Bit, Classical Stile and Rail Set-Up Jig.
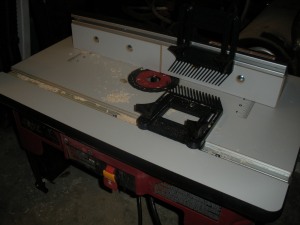
My Skil Router Table
I decided to start with the stile bit since that would be the majority of the routing. Stiles are the vertical pieces on a cabinet door such as a raised panel door or in my case a flat panel door, but you use the stile bit to route the inside edge of both the rails and stiles. This creates the decorative edge and the rabbet where the panel is inserted during final construction. I used the set-up jig to help me set up my bits, figuring that as long as the jig and the bit were fitting correctly, I would be good to go when it came time to run my pieces through. That sounds good in theory, but when I flipped on my router I saw the move downward about 1/4 inch. I shut off the router, checked with the jig and sure enough, I was way off now. I reset the depth and flipped on the router again and didn’t see any movement. Double checked it one more time with the jig and it was still good, so I decided to run a test piece to see how it did. Well, it started out good, but as I ran the piece through the bit sunk again and I ended up with a piece that was extremely sloped. Dropped the router out of the table, inspected the locking mechanism and found a set screw that needed to be tweaked a little bit. A couple of turns on the set screw did the trick and I was able to run a couple of good test pieces.
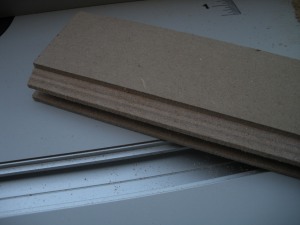
Stile Test Piece
So after running the good stiles it was time to change bits and figure out the best way to make the rails. First I set up the bit using the jig, remembering to take a couple of pictures this time.
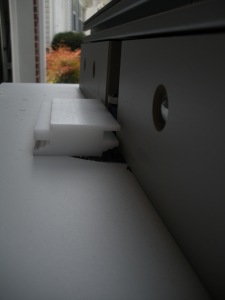
Setting up the Rail BitSetting Up the Bit
I ran the rail test piece through and realized the first time that I had it upside down. Grrr. I also had a difficult time keeping it square when I ran it through, so I attached a sacrificial fence to my miter gauge for the next pass. Chopped off the end on my miter saw, held the piece against the sacrificial fence nice and tight and tried again. Success!
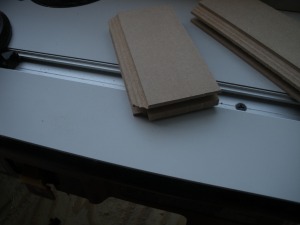
Rail Test Piece
Or so I thought anyway. It turns out that the jig isn’t quite as fool-proof as I thought, or maybe I’m just too much of a fool for fool-proof. Regardless, when I put the two test pieces together they did not line up exactly right. The stile piece is slightly higher than the rail piece, maybe 1/32 of an inch. That may be as good as I’ll ever get it, but I think I can do better. You can’t tell it very well from the picture, but there is a difference in elevations, trust me.
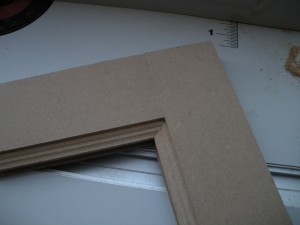
Not quite good enough
So after all of this, I decided I had enough for one day and cleaned up my mess and moved on to something I’ve been wanting to do for a few months now….
Beer Cart Build
I consider myself a novice homebrewer. I haven’t brewed since before our son was born last year but it’s a passion I’ve been wanting to get back to for months now. The biggest problem I have when it comes to brewing is room. I don’t have a lot fo room in the garage for storage of all the equipment I have, so I’ve been trying to figure out how to consolidate everything into one moveable cart that I could wheel out when I’m ready to brew, then wheel back in when I’m done. I started building a brew cart back before I began this blog, so I don’t have any pictures of the build, but I can tell you I have built the cart with almost zero expense using scraps of communications racks taken out of the dumpsters where I work. Apparently someone order too many 4-post racks and rather than store them some where decided to get rid of them. Score one for the cheap DIY homebrewer! I modified the rack heavily, but it came out super sturdy when all was said and done. It has to be considering it will potentially be supporting about 30 gallons of water, plus propane burners and stainless steel kegs that have been modified to be used as brew kettles. The last thing I want is my cart to collapse while I’m brewing. So here is my brew cart as it is now…
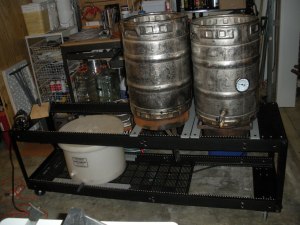
This is the after picture
If you look at the picture above, you will notice I have just put some cross braces to support the burners. They are the four grey pieces you can see. These braces are made of solid steel and are used for super-structure support in data centers. They are extremely strong. I thought about mounting the burners to the cart somehow, but I ran onto two problems. One, the rack is aluminum and will conduct heat extremely fast, so I want as much space between the fire and the aluminum as possible. Two, I am using two different types of propane burners and neither of them are big enough to easily attach to the cart even I wanted to. So, I went with what you see. Drilling the holes through the steel was fun. I originally just went with my corded drill and tried to do it by hand. That was a bad mistake. I broke two step-bits and melted a third trying to drill through those things. So this time, after picking up some more step bits at Harbor Freight Tools, I remembered i had a drill press under my work bench. So I set it up and went to work.
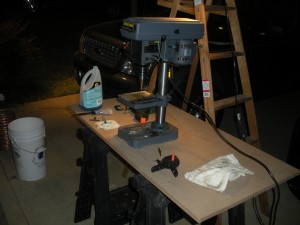
Make Shift Machine Shop
As you can see it got dark on me by this time so I had the step-ladder out there supporting a shop light. I used some old car wash soap to lubricate my drill bit as I was drilling. It worked great and I was able to get the steel pieces drilled and mounted in no time.
I’m still working out the details of how I plan to set it all up, but I’m getting there. I will go into more detail on the individual pieces later but at least I’m moving on it again.
Of course I can’t work on my brew cart without enjoying a beer. It turns out that I have a few bottles of Saison left from last year that have been hiding in my closet. This was a good beer then, but it’s even better now. It was brewed with orange peel, coriander, and grains of paradise, so it has a nice citrus/pepper flavor that has aged nicely. It was nice to drink one of my own beers for a change.

Home Brewed Saison
Part two coming tomorrow….


